Mess of the Month Part IV: Backsplash and finishing touches
If you've been following along, worked slowly on a kitchen renovation project for 2 about months... then forgot to ever post the final installment of my remodel. In the spirit of keeping my sanity, I broke the project up into four posts, then dropped the ball for 2 years and never put the final post together. But now you've finally (can you believe it, I can't) reached the last one. You can see the back story below.
Part III: Flooring, Appliances, and Hardware
Part IV: Backsplash and Finishing Touches
Part IV: Backsplash and Finishing Touches
After the floor was finally in, the next big hinderance to my well-being as a kitchen owner was that all of my baking supplies were sitting on my countertops, and my mixing bowls were still in the living room on my bookshelves.
So, to deal with the problem at hand I was finally motivated to hang the open shelving I'd been so excited about when I planned my kitchen.
I bought 8 ft of Whitewood 12 x 1 at the Home Depot and cut it down to three 29.5" shelves. I stained all three, now using a well, stirred version of the Red Oak stain that was pretty close to the same color as my counter tops. Then, I gave each shelf two coats of inexpensive wipe on polyuethanine from Minwax (left over from the desk project).
Per Dad's advice, I wanted to attach the shelf cleats to the cabinets rather than the wall. So, I found a 6 ft scrap of 1x3 pine (left over from the closet project) and chopped it into 11" lengths. I gave each a couple of coats of white, high gloss paint I'd had mixed to match the color of my cabinets, and set them with two screws each into the cabinets. This was sort of a painful process. It hurt a bit to drill holes in my pretty (and expensive) new cabinets. But, the result was worth the pain.
Once I patched the screw holes and covered them with matching paint, I had lovely open shelving just like on Pintrest. You like the jars? They're Anchor brand, they came from Target. They're one of my favorite things in the kitchen.
By this point, school had started back up and I had transitioned rapidly from "let's make my kitchen beautiful" mode to "let's make my kitchen livable" mode. So, decorative touches like trim and baseboard sort of took the backseat to more pressing matters like backsplash and lecture prep.
I had originally planned on beadboard for my backsplash, but friends and family insisted that tile would be a bigger improvement, and thus add more to the value of my home in the long run. Although I'm well aware that someone is going to walk into my kitchen in 10 years and groan at the distinctly 2015 look of subway tile, I like subway tile. Also, having lived in a couple of apartments with white tile and white grout in the kitchen I feel very strongly that the kitchen is no place for white grout. Anyone who uses white grout in their kitchen better have a cleaning lady, because white grout will quickly become gray-brown grout. Instead I went with slate gray grout a la my homegirl the Nichole Rehab Addict.
If I knew then what I know now, I may have stuck with beadboard. But, I didn't. So, I valiantly purchased subway tile, thin-set, grout, and a tile setting kit. In the interest of simplicity, I used these mosaic tile sheets instead of individual tiles.
After reading a number of tutorials online about how to lay backsplash, and a number of pep talks from friends and family (thanks Aunt Ellie!) I started in on the project. The one thing no one online told me was that tile work is a big damn mess. You should put a drop cloth down over everything, especially your new countertops and flooring.


At the advice of the internet I tried to use "grout caulk" on the edges to make a clean line. Grout caulk is not easy to clean up. Grout caulk is a mess. It doesn't make a straight line. It can't be flattened out. It's the worst! I ended up throwing the whole tube in the trash and filling the edges, corners, and seams with actual grout and just cleaned it up where it didn't belong. Once all the grout was dry I pulled out some paint and covered up the grout and thin set I hadn't properly cleaned up.
I reinstalled my light plate covers (okay, I may have had to buy some slightly larger plate covers) and glued (yep, glued, I'm getting tired of this project) my window sill back on. I touched up some trim paint and slid the stove back in place. With the semester back in full swing I had no time for a chaotic kitchen!

The next issue I ran into in the new kitchen (you notice, still no baseboard?) was the lack of a good cutting board. My old kitchen had a slide out cutting board built in that was so scuzzy I once had to throw away a loaf of banana bread because it sat on the board too long and started tasting like 70 year old dirt. It was upsetting.
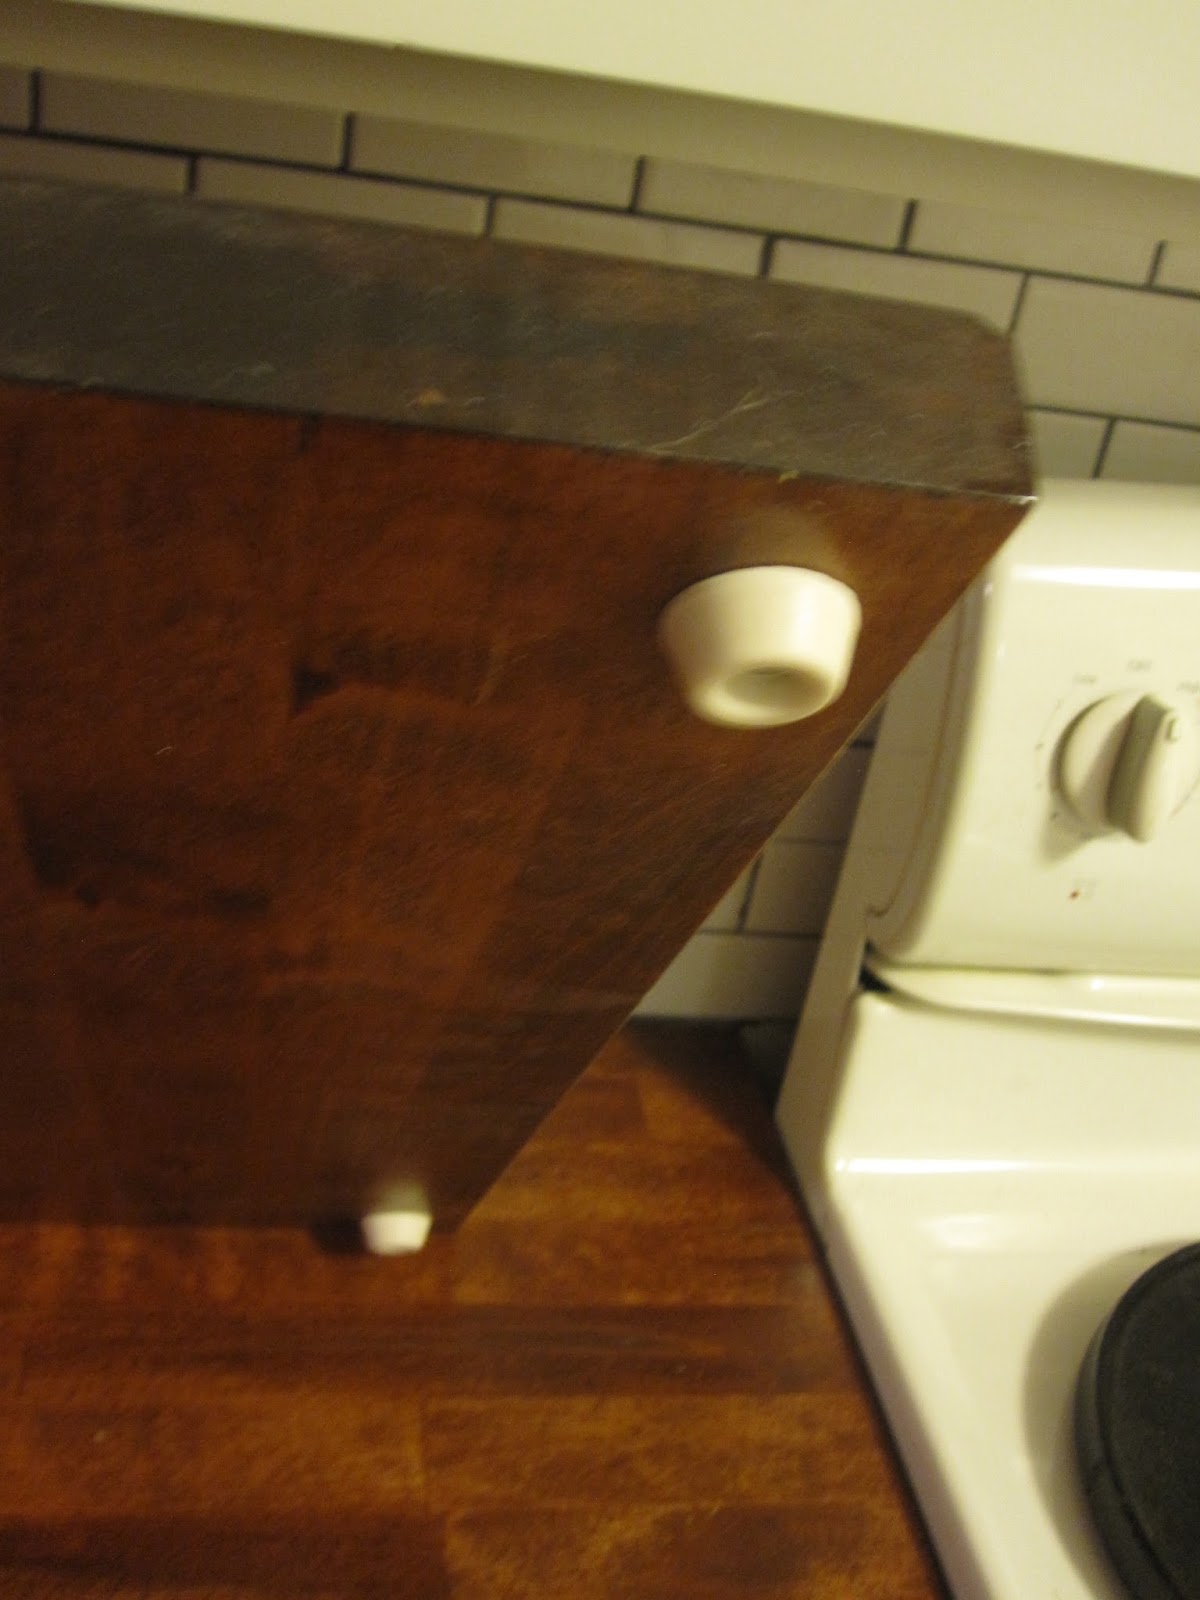
My brother recently remodeled his kitchen and installed butcher block, and had the the awesome idea to take a scrap of countertop (his came from the hole he cut to install his stove) and added some legs to make it a butcher block cutting board.
Since I still had a fair amount of left over countertop in the basement, I chopped a 14" x 20" chunk out of a scrap, stained it and sealed it with copious amounts of waterlox. I ordered a set of "rubber bumpers" off of amazon ($2), and added them to serve as feet. It was an easy, cheap side project that I'll enjoy every time I need to chop anything.

With a fully functioning kitchen, I turned to the now somewhat distracting problem of the trim boards I'd removed (now 2 month ago) that were still sitting in the basement...
I bought baseboard at home deport that I though was going to work. I painted it and cut it to length. Then, I went to install it and learned that it was just a bit too wide to fit... of course. Then I pulled out the trip piece for above the window (which I had saved when we took out the old cabinets), and it was a bit too short (of course).
About this time it was Christmas, and I darted off for the holidays in California. By spring break, I was interviewing for a job in California, and by summer, I was packing up to move...
So, I took some leftover white paint from the trim and I gave the whole area under the cabinets a good couple of coats of white. My mom will read this and shake her head at me, as my dad has yet to install the baseboards in the kitchen in their home that he remodeled in 1991. But alas, I rented out my house and moved to California with no baseboards... and that's life. I made my dream kitchen, but I had to let it go.


Comments