Wanna Manapua?
Last summer I went to Hawaii with some friends from college and was introduced to manapua. The minute I bit into this meat-filled steamed doughy masterpiece I knew I had to learn how to make them. But, school started and things got busy and I forgot all about my new favorite snack. When the thermometer hit 103 a few days ago I knew I couldn't run the oven but I had an inkling to make some bread. Obviously, it was manapua time. I did a little research online about how to make what is essentially Hawaiian style dim sum bao and decided, as usual, that the only way to learn was trial-by-fire. I didn't have any char-siu or any taro (my two favorite manapua fillings) so I decided to make do with what was in the fridge (canned pumpkin and a block of tofu) and this is what I came up with:
Manapua Dough
makes 24 smallish bao
1 packet dry active yeast
3 tbsp lukewarm water
2 cups lukewarm water
1 tbsp canola oil
.25 cup granulated sugar
.75 tsp salt
6 cups white flour
Sprinkle 3 tbsp water over the yeast and allow to soften. Add remaining water, sugar, oil, and salt.
Put all 6 cups of flour in a stand mixer with a dough hook attachment. With mixer on low speed slowly incorporate water mixture to flour. It will be wet. Leave the mixer to knead the dough for about 6 minutes or until the dough is soft.
Remove from bowl. Wash bowl and spray with non-stick spray. Place dough back in bowl and turn to cover with oil. Cover with plastic wrap and place somewhere warm for one hour (dough should double in size). At this point some dough recipes say you should put it in the fridge for another 3-6 hours for the flavor to develop. I skipped this step but I would HIGHLY recommend doing it. There is a certain "sourness" that is just missing from my dough, and I know exactly why.
While the dough is rising prepare your filling. One option is to run to the chinese take-out place on the corner and get char-siu. Another piece of prep work you'll want to do while your dough rises is cut your waxed paper squares. Most websites fail to mention this very important step and you will have a sticky mess on your hands if you don't do it! Cut 24 squares of parchment or waxed paper about 3 inches by 3 inches. If you're short on paper make the squares smaller, but the idea is for each boa to fit on the square without much hanging over the edge.
Punch down dough and separate into 24 evenly sized balls. Each ball will be about the size of a plum. Letting the balls rest at least 5 minutes before continuing will make the next step a lot less messy.

Tofu "Char Siu"
makes filling for 12 smallish bao.
12 oz extra firm silken tofu
1 tbsp Kikkoman Lite Soy Sauce
1 tbsp Nakano Seasoned Rice Vinegar
1 tsp Hoisin Sauce
.5 tsp Madhava 100% Pure Agave Nectar Light
.5 tsp black pepper, black
.5 tsp ground ginger
.5 tsp garlic powder
Slice tofu into 2 inch strips and let sit between layers of paper towel for about 30 minutes to removed excess moisture.
Mix all other ingredients in a pie tin or marinating bag. Add tofu. Allow to marinate at least one hour.

Pumpkin Filling
makes filling for 12 small bao
1 can (15 oz) pumpkin
.25 cup powdered sugar
Mix pumpkin and sugar together over medium heat in a small saucepan. Cook for about 5 minutes or until pumpkin thickens.

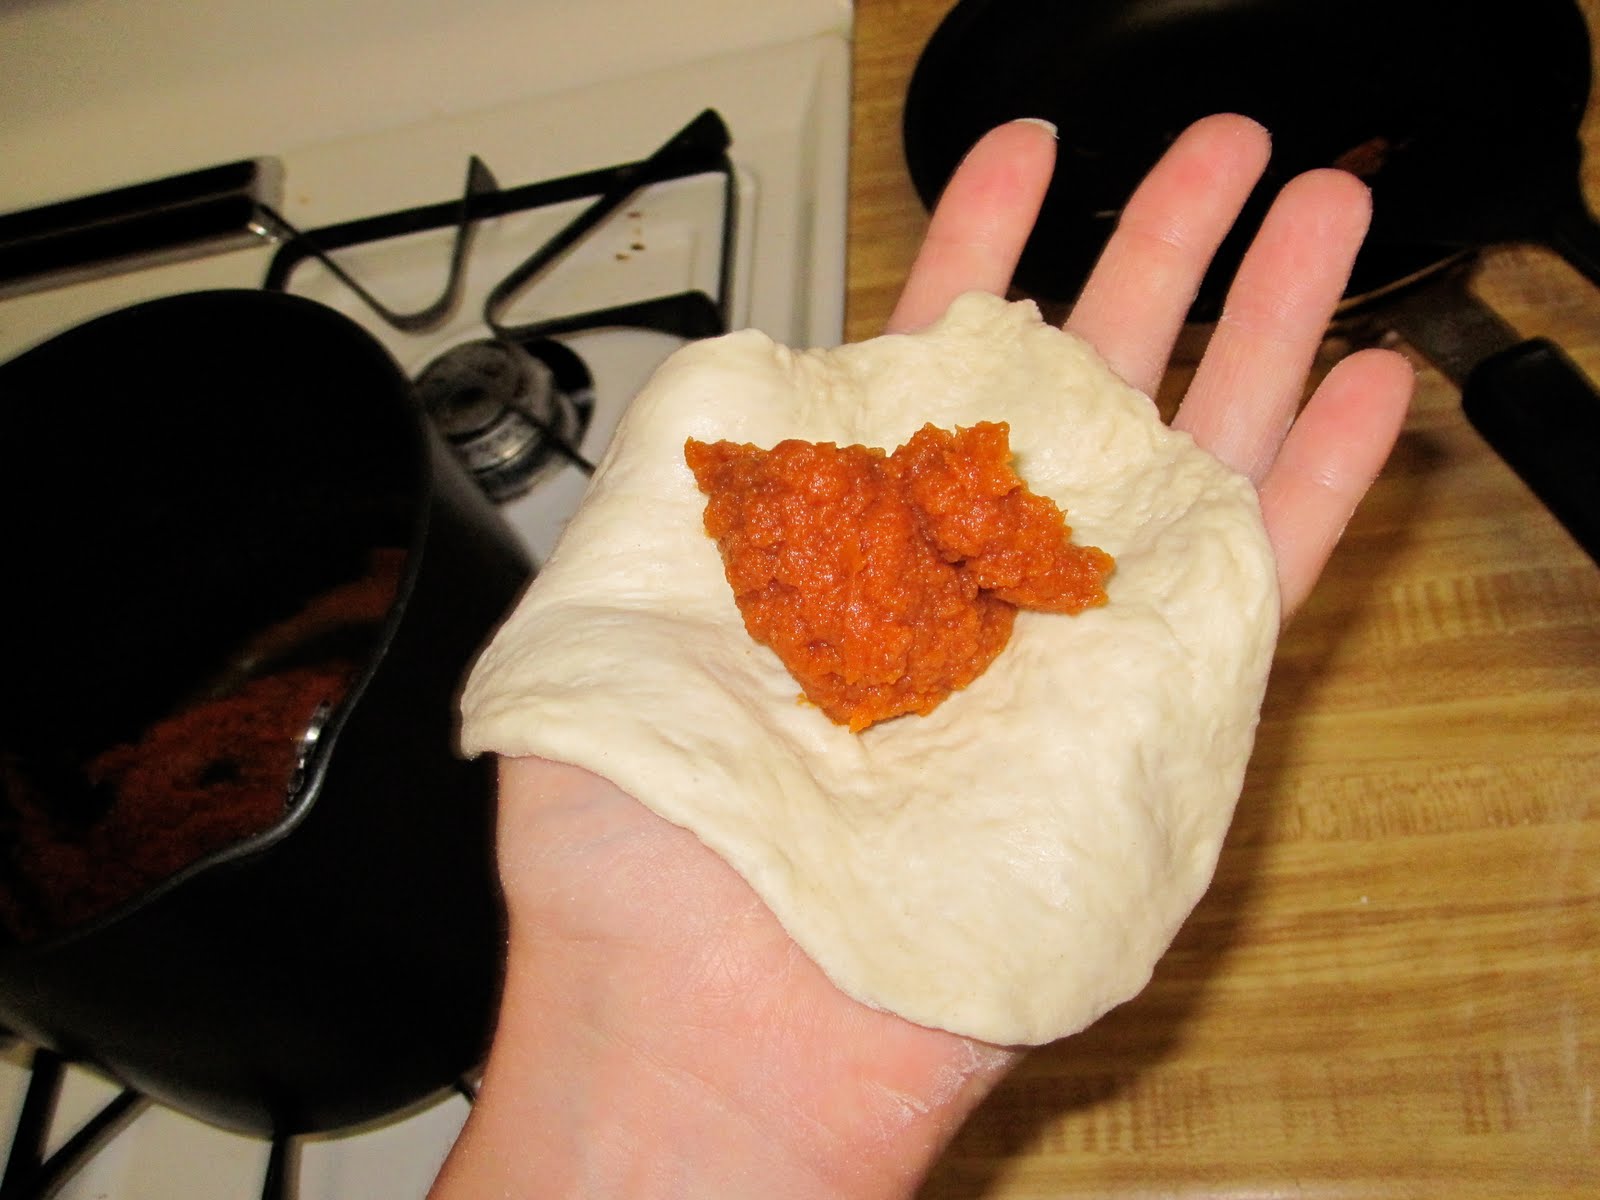
Now it's time to fill the manapua. Pick up one ball of dough and flatten it into a 5 inch disk by pulling on the sides. Try to leave the center thick and spread the sides out because when you wrap and seal it you will want the dough on the top to still be as thick as the dough on the bottom.

Cupping the disk in your palm, place a spoonful (aim for about 2 tbsp) of filling in the center of the disk and wrap the dough around the filling to form a dumpling. Pinch the dough together to seal well. Place the sealed side down on a square of waxed paper.
As you can see, this is going to take a while. If the kitchen is warm you'll want to pop about half of the balls into the fridge to while you fill the first half so that they don't rise out of control, but pull them out when you have a few left of the first batch, so they have few minutes to come back to room temperature before you start flattening them.
If you are making more than one type you'll want to mark them with food coloring to differentiate them once they're cooked. DO NOT put a whole drop of food coloring on each one, it will make a mess. Try putting a drop of food coloring on a piece of leftover plastic wrap and dabbing each manapua with the plastic. It doesn't make a perfect dot, but it's fast and easy. I used yellow for pumpkin and green for tofu.
Make sure the bao have rested for at least 20 minutes before you start steaming. If you work as slowly as I do that won't be a problem. If your kitchen is warm put the prepared boa in the fridge while you steam and only have as many as you can steam in one"batch" out at a time. This isn't essential, but it's a good idea. The 20 minutes of resting allows the dough to rise once more. They wont change a lot, but I decided to document the change just to prove something was actually happening.


Place a bamboo steamer in a large pot with a lid. Fill about 3/4 inch of water at the bottom of the pot and place over low heat. When the water begins to boil you can put in your first batch of manapua. The bao will expand a little more while they cook, so be mindful of how close together you are packing them. My steamer is just a little fellow, so I could only cook one in each level at a time.


I was curious about just what I was eating (I have to fit into my jeans again by fall, so I'm trying not to overdo it on the bread these days) so I calculated the nutrition content for these little guys. Not bad at all if I do say so myself:


Comments